|
Prep Time
90 minutes
|
Cook Time
22 minutes
|
Total Time
780 minutes
|
Servings
12 croissants
|
The sound is what tells you first. A clean, papery crack when you press the crust — not a thud, not a squash. That crack is the result of roughly forty thin layers of dough and butter that spent the better part of a day being folded, chilled, folded again, and then blasted with heat until the water in the butter turned to steam and pushed everything apart.

When you pull a properly laminated croissant from the oven, the smell isn’t sweet — not immediately. It’s nutty and faintly caramelized, with a yeasty undertone that the fermentation left behind. The color is a deep, uneven amber, darker at the tips. Press the bottom and you’ll feel it give slightly, then resist. That resistance is the crust holding its shape against the hollow interior — a structure built entirely from fat, starch, gluten, and a small amount of sugar doing very specific jobs. Understanding those jobs is what separates a reliable result from a recurring disappointment.
Why you’ll love this recipe
Ingredient Notes
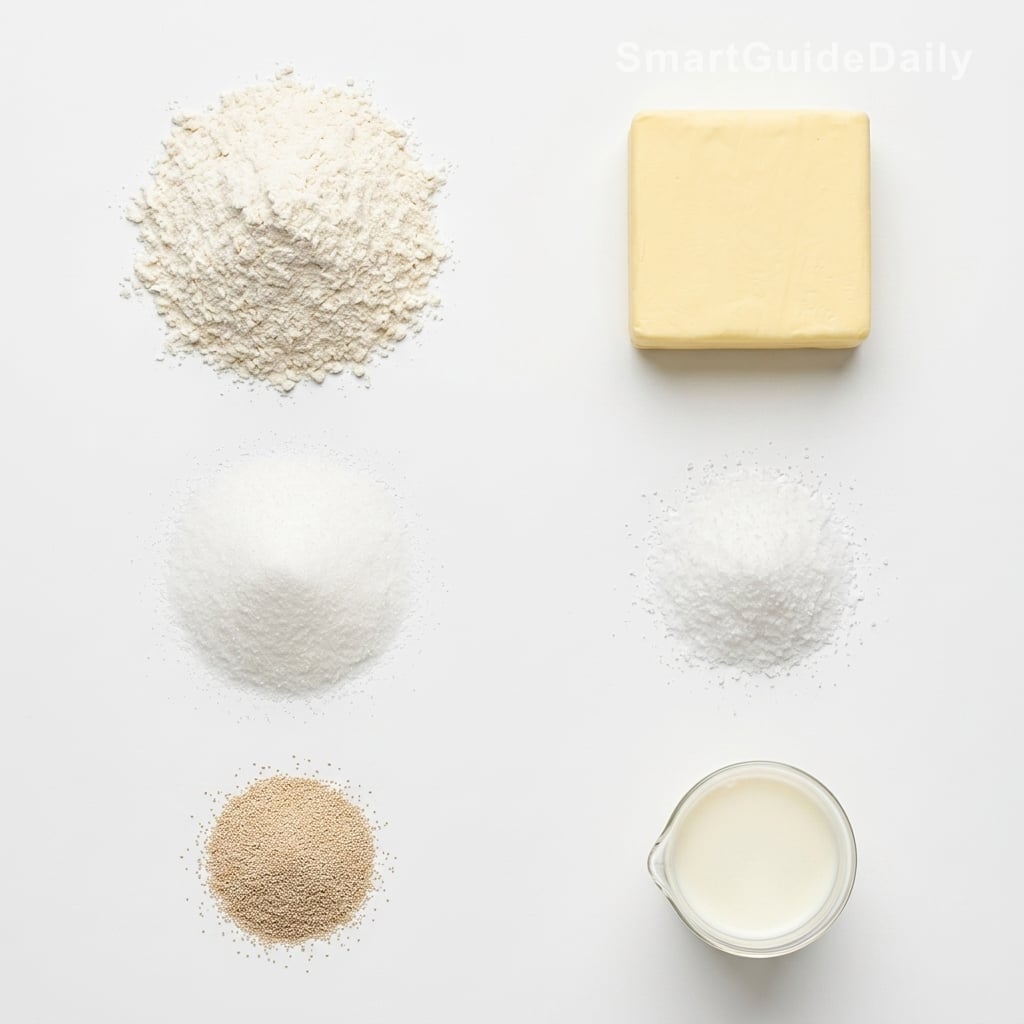
Four components, one relationship: flour for structure, butter for separation, sugar for browning, yeast for lift.
- High-fat European-style butter (84% fat minimum) : This is the one place where butter quality genuinely changes the outcome. Higher fat content means less water, which means less steam distortion during lamination. The butter also needs to be pliable — cold but not brittle. At around 60°F (15°C), it bends without cracking and without smearing into the dough.
- Bread flour (12–13% protein) : Higher protein builds more gluten, giving the dough the tensile strength to survive repeated folding without tearing. All-purpose flour at 10–11% protein will work, but the layers are less defined and the structure less predictable under heat. The difference shows clearly in the crumb.
- Whole milk : Contributes to a dough hydration of approximately 55–58%, keeping the détrempe firm enough to laminate cleanly. The fat and proteins in milk also accelerate browning — both the Maillard reaction and caramelization run faster with a milk-based dough than with a water-based one.
- Fine sugar (8% of flour weight) : Sugar does two things here: it feeds the yeast during the initial fermentation, and it drives browning in the oven. Too little and the crust stays pale and flat-tasting. Too much and it competes with gluten development, softening the structure. Eight percent is close to the functional ceiling.
- Instant yeast : The dough spends most of its life cold, which dramatically slows fermentation — intentionally. A long, cold fermentation builds flavor compounds without over-proofing the structure. Use instant yeast to avoid the activation step; active dry yeast adds an unnecessary variable.
- Fine salt (2% of flour weight) : Strengthens gluten, moderates yeast activity, and sharpens flavor. Add it after the initial mix — direct contact between salt crystals and yeast before hydration can reduce yeast viability. Two percent is standard. Don’t reduce it.
Take Your Butter Out of the Fridge — but Not for Long
Temperature is the single variable that breaks most lamination attempts. The butter needs to be cold enough to stay as a discrete layer between the dough sheets — not melt into them — but pliable enough to fold without shattering and tearing through. Butter straight from the refrigerator will crack on contact with a rolling pin, creating gaps, uneven layers, and eventually, a dense crumb. The target is around 60°F (15°C): the butter should bend slowly under pressure, not snap. Beat it between two sheets of parchment into a flat 7-inch square, then let it sit at room temperature for no more than 15 to 20 minutes before enclosing it in the dough. If it softens past the point where it smears rather than holds its shape, refrigerate it for 10 minutes. It works because lamination is a physical process, not a chemical one — if the two materials are at different temperatures, they merge instead of staying separate, and no amount of folding recovers that.

Mix the Dough Until It’s Smooth — Then Stop
The détrempe wants to be roughly 55–58% hydration: firm, not sticky, not stiff. Combine flour, salt, sugar, and yeast dry, then add cold milk and mix until a cohesive dough forms. The gluten should be developed enough to hold together but not so tight that it fights back during rolling — which is why you mix to smooth, rest for 30 minutes in the refrigerator, then begin. Over-developed gluten at this stage springs back aggressively. You will roll the dough out to 12 inches, turn away for 30 seconds, and find it has contracted to 9. You are not doing anything wrong; you are just overmixed. A cold rest allows the gluten network to relax significantly. After that, the dough should extend without resistance and stay where you put it.
Three Folds Is Usually Enough
Beyond 81 layers, the butter sheets become so thin that they partially merge during baking. You get lift, but you lose the distinct open-layer structure that defines a properly laminated crumb.
Each letter fold multiplies the layer count by three. One fold: 3 layers. Two folds: 9. Three folds: 27. Four: 81. Five: 243. The instinct is to keep folding — more folds, more layers, better result. That instinct is wrong. Three to four folds, with a mandatory 30-minute refrigerator rest between each one, is all this process requires. The rests are not optional pauses. The dough warms slightly with every fold, and if the butter softens past its working temperature, it stops behaving as a separate layer and starts incorporating into the dough. Cold is not an obstacle here. Cold is the mechanism.
Shape Quickly, Then Leave It Alone for Two Hours
Roll the laminated dough to approximately 4mm thickness — thin enough to feel the layers shift slightly under the rolling pin, like stacked paper. Cut it into long triangles with a base of roughly 4 inches. Shape each one by stretching the triangle gently before rolling it from the wide end toward the tip; the tension you build during shaping is what keeps the croissant from unraveling in the oven. Lay the shaped pieces on a lined baking sheet, cover loosely with plastic, and proof at a cool room temperature — around 70°F (21°C) — for 2 to 3 hours. A correctly proofed croissant has visibly expanded and jiggles faintly, like barely-set gelatin, when you move the tray. If it slumps or feels spongy, it has over-proofed and the layers will compress in the oven rather than separating.
Bake at 375°F (190°C) and Don’t Open the Door
The oven does the final work: the water in the butter layers flashes to steam and forces the laminations apart, the yeast gives one last burst of activity before the heat kills it, and the sugars at the surface caramelize into that uneven amber. All of this happens in roughly 18 to 22 minutes, and the internal temperature should reach 190°F (88°C) for the crumb to be fully set — below that, the layers near the center remain raw and gummy. Use a probe thermometer if you want certainty. Color is a reliable secondary indicator: a deep, uneven amber — not uniform golden — means the surface caramelization has gone far enough. Pale croissants taste under-baked because they are under-baked.

Tips & Tricks
- Rest the dough in the freezer — not the refrigerator — for 15 minutes between folds if your kitchen runs warm. The goal is to keep the butter at 60°F (15°C), and a warm kitchen actively works against that. The freezer is more aggressive but more reliable when you’re racing the ambient temperature.
- Egg wash twice: once before proofing and once just before baking. The first coat dries into a thin film that helps the second adhere and creates more even browning. Use yolk thinned with a small amount of milk rather than whole egg — whole egg washes tend to foam and produce patchy, uneven color.
- If the butter visibly breaks through the dough surface at any point during lamination, stop immediately, wrap the dough tightly, and refrigerate for 30 minutes before continuing. Forcing a fold through broken lamination creates pockets of butter rather than layers, and there is no recovery from that without starting the lamination process over.

Why does my butter crack and tear through the dough when I roll it?
The butter is too cold. At refrigerator temperature (around 38°F / 3°C), butter is brittle — it shatters under pressure rather than bending with the dough. Beat the butter block to 60°F (15°C) before enclosing it: it should bend slowly without snapping, and hold a clean edge when cut. If it cracks on the first roll, wrap the whole package and refrigerate for 20 minutes, then let it warm slightly before continuing.
Can I use all-purpose flour instead of bread flour?
Yes, but the result will be measurably different. All-purpose flour at 10–11% protein produces a more tender crumb with less defined layer separation. Bread flour at 12–13% builds more gluten, giving the dough the tensile strength to hold distinct laminated layers under repeated folding without tearing. If all-purpose is all you have, reduce the milk by about 10ml to account for the lower absorption rate.
How do I know when the croissants are properly proofed before baking?
Two indicators, used together. First, visible expansion — the croissants should have grown noticeably, roughly 1.5 to 1.75 times their shaped size. Second, the jiggle test: gently shake the baking sheet. A correctly proofed croissant moves like barely-set gelatin, with a slight wobble that stops quickly. If it slumps, the gluten structure has weakened from over-fermentation and the layers will compress in the oven rather than separate.
My croissants came out dense with no visible layers — what happened?
The most common cause is butter that melted into the dough during lamination, either because the butter was too warm or the rests between folds were too short. Once the butter incorporates into the dough, it stops functioning as a separator and becomes a fat-enriched bread dough. There is no recovery from this mid-process — the only fix is a longer, colder rest next time. If this happens consistently, start doing your folds in a cooler room or work in shorter sessions with longer freezer rests.
Can I split this process over two days?
Yes — the laminated dough holds well in the refrigerator for up to 24 hours after the final fold. Wrap it tightly and refrigerate overnight; the cold also slows the yeast, which extends the flavor development slightly. Shape the following day, then proof and bake as normal. You can also freeze shaped, un-proofed croissants for up to one month — proof directly from frozen, adding 1 to 2 hours to the proofing time.
Why are my croissants spreading flat rather than rising upward?
Either the dough over-proofed before baking, or the shaping tension was insufficient. When you roll each triangle, you need to apply gentle but deliberate tension from base to tip — that tension is what keeps the layers compressed during proofing and then forces them to expand upward (rather than outward) in the oven. Tucking the tip firmly under the croissant before placing it on the tray also helps anchor the shape.
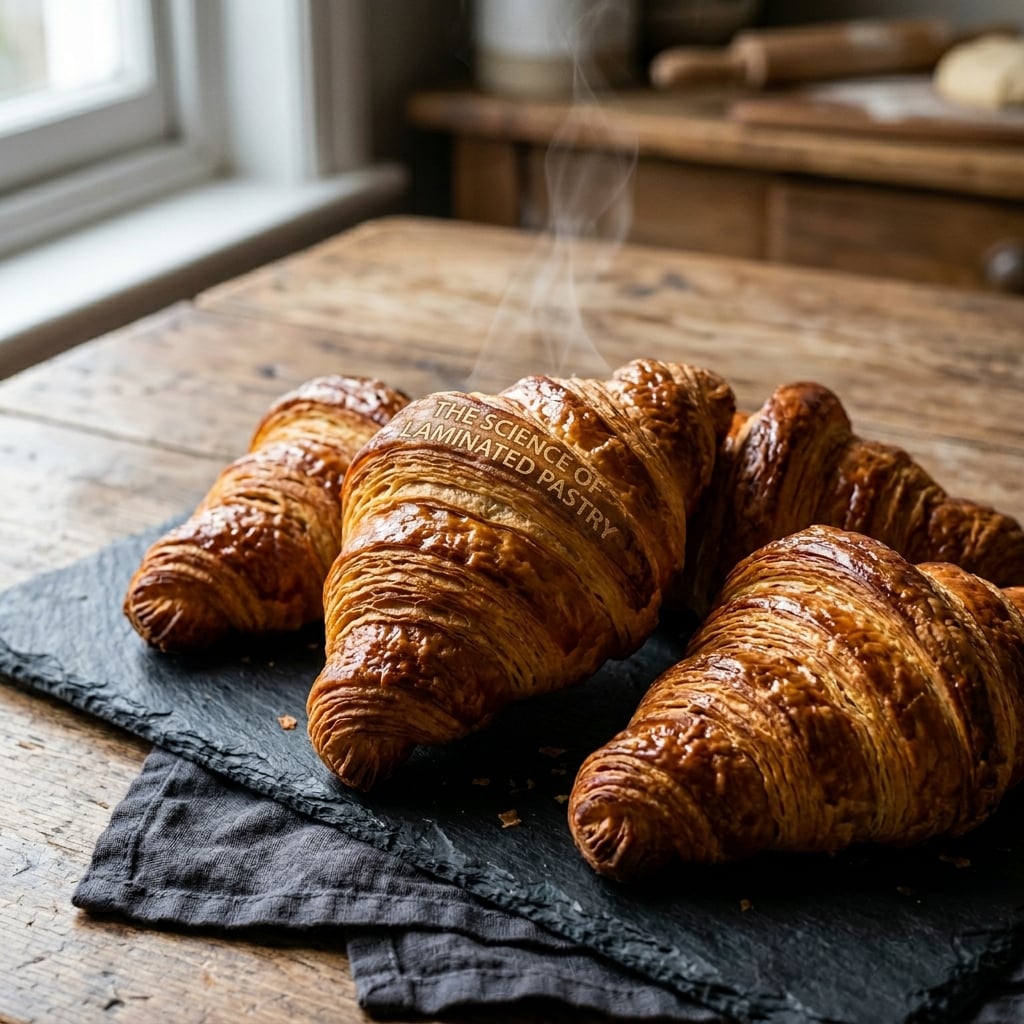
Laminated Croissants
French
Pastry / Technique
|
Prep Time
90 minutes
|
Cook Time
22 minutes
|
Total Time
780 minutes
|
Servings
12 croissants
|
A working recipe for classic laminated croissants. Three folds of 84% fat butter into a 56% hydration dough, cold-proofed and baked at 375°F until the internal temperature reaches 190°F. No shortcuts — but no unnecessary steps either.
Ingredients
- 500g bread flour (12–13% protein)
- 280ml whole milk, cold
- 40g fine white sugar
- 10g fine salt
- 7g instant yeast
- 30g unsalted butter, softened (for the dough)
- 280g European-style unsalted butter, 84% fat (for lamination)
- 1 egg yolk
- 15ml whole milk (for egg wash)
Instructions
- 1Combine flour, sugar, salt, and instant yeast in a large bowl. Add cold milk and 30g softened butter. Mix until a smooth, firm dough forms, about 5 minutes by hand. Shape into a flat rectangle, wrap tightly in plastic, and refrigerate for 1 hour.
- 2While the dough rests, beat 280g cold butter between two sheets of parchment with a rolling pin until it forms an even 18cm square approximately 1cm thick. The butter should be pliable and bend without cracking — around 60°F (15°C). Refrigerate until needed.
- 3On a lightly floured surface, roll the chilled dough into a rectangle roughly twice the area of the butter block. Center the butter block on the dough, fold the dough edges over it, and press the seams firmly to seal completely.
- 4Roll out to a long rectangle of approximately 20 x 60cm. Perform a letter fold: fold the bottom third up, then the top third down over it. Wrap and refrigerate for 30 minutes. Repeat the roll and letter fold twice more, for a total of three folds, resting 30 minutes in the refrigerator between each one.
- 5After the final rest, roll the dough to 4mm thickness. Cut into 12 long triangles with a base of approximately 10cm.
- 6Stretch each triangle gently from base to tip, then roll tightly from the wide end toward the point, maintaining tension throughout. Place on two parchment-lined baking sheets with the tip tucked underneath.
- 7Whisk together the egg yolk and 15ml milk. Brush each croissant lightly with egg wash. Cover loosely and proof at 70°F (21°C) for 2 to 3 hours, until noticeably expanded and the dough jiggles gently when the tray is moved.
- 8Preheat oven to 375°F (190°C). Apply a second coat of egg wash. Bake for 18 to 22 minutes until the surface reaches a deep, uneven amber and the internal temperature reads 190°F (88°C) on a probe thermometer.
- 9Transfer to a wire rack immediately. The layers continue to set as the steam escapes. Wait at least 10 minutes before cutting.
Notes
• The butter block and the dough should be at the same consistency when you begin laminating — both pliable, neither warm. If one is significantly colder than the other, they will behave differently under the rolling pin and the layer separation will be uneven.
• Croissants are at their structural best within 2 hours of baking. The crust begins absorbing moisture from the crumb after that. Reheat in a 325°F (160°C) oven for 5 minutes — not a microwave, which steams rather than crisps.
• Shaped, un-proofed croissants freeze well for up to one month. Proof directly from frozen at room temperature, allowing an extra 1 to 2 hours beyond the standard proofing window.
• If your kitchen runs above 72°F (22°C), chill the baking sheets before placing shaped croissants on them. Warm metal accelerates proofing from the bottom up, which produces uneven lift.
Nutrition Facts (per serving, estimated)
| 278 kcalCalories | 6gProtein | 28gCarbs | 16gFat |